In order to track times, payroll and submit to STP the team members will need to be added to the ClockOn system. This article details the steps involved and the options available for adding and editing employees within the ClockOn system.
Adding Employees
To access the employee details screens simply open the Employees screen by either clicking on the Employees main screen box or by selecting the Setup menu item and selecting Employee Details.

To initiate the process use the Actions button and click the + Add Employee.

When adding new employees the system will require the following
- The system will prompt to set a Default Superfund is not set.
- An available license for the new employee will be required.
If this is your first time adding employees to the system since our Employee Onboarding update you will see the following message asking if you would like your employees to be invited to the FLARE benefits application as part of the process

Please note that the Flare Benifits system is optional and the use of this can be toggled from our HR & Rewards screen.

Once the above prerequisites have been completed, then when adding the new employee you will be presented with the following screen to collect the initial information for the employee.
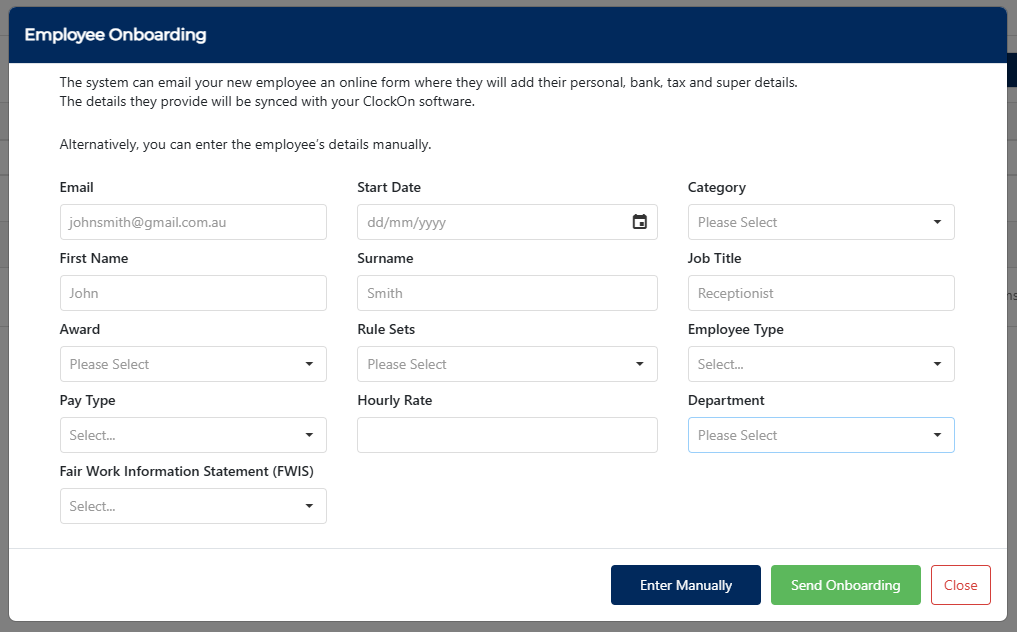
From here you have two options for entering the details into the system.
- Add the initial detail and then use the Send Onboarding process.
- Enter the details directly into the system using the Enter Manually method.
Entering Employee Details (Onboarding Using FLARE)
The employee-centred onboarding method uses our partner integration with Flare to allow you to enlist your new employees to complete their personal details rather than you doing it on their behalf.
To initiate this process complete the details on the initial screen, then select the Send Onboarding option.
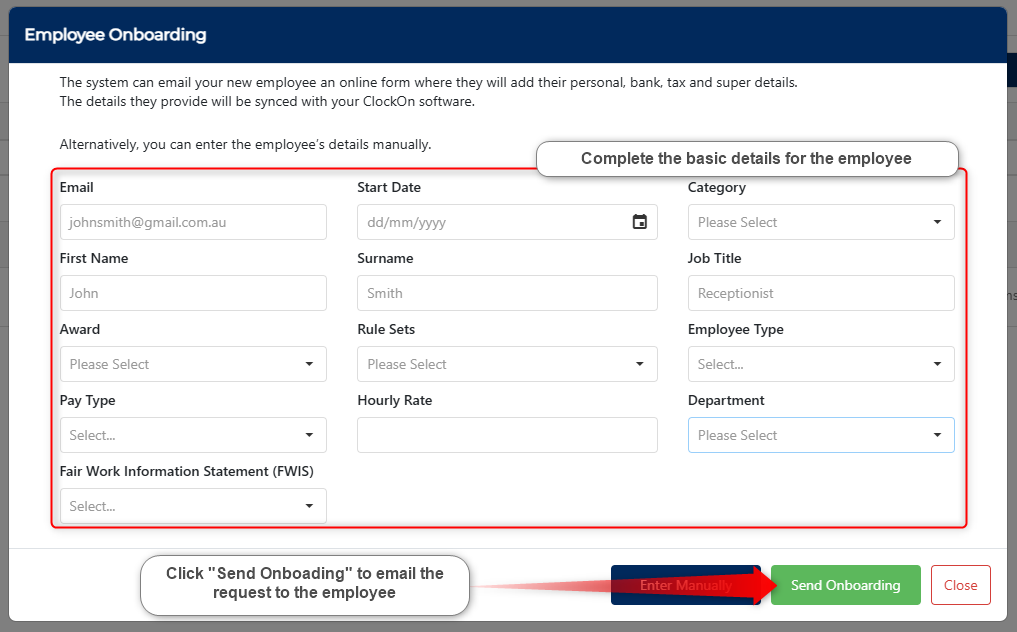
This process will send the employee an email with a link for them to complete the process.
Whilst the employee is doing this process the record will be listed within the Onboard section of the Employees screen.

It is important to note that while on this section no detail can be added or updated until the employee has completed their process. The exception to this is that the request can be cancelled using the Options button if desired.

Once complete the information will be passed back to ClockOn, and the employee will be available to be used in the system.

Entering Employee Details (Manually Method)
If you elect to not use the employee onboarding method you can still manually enter the details for the employee in the system. To do this use the Enter Manually option.
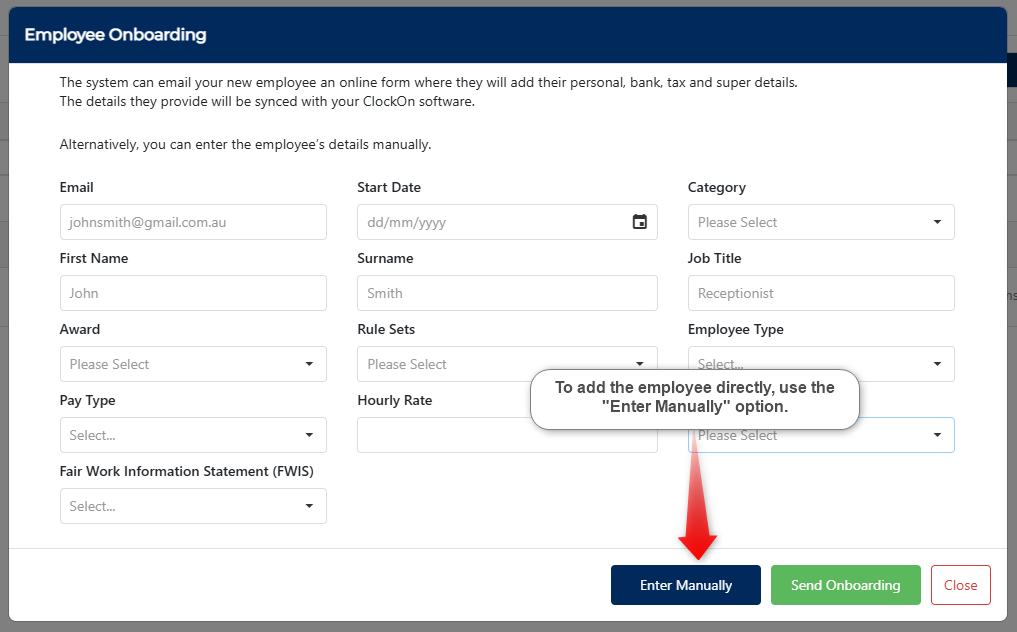
This will redirect you to the following screen where you can enter the details for the employee, please see below for the available options.
This is broken down into the following sections
- Personal Details
- Contact Details
- Pay Details
- Tax
- Configuration
- Super Selection
Personal details
This section details the employee's basic name and DOB information, it also includes the date on which they are starting with the business.

Contact Details
This section details the email phone and address of the employee.

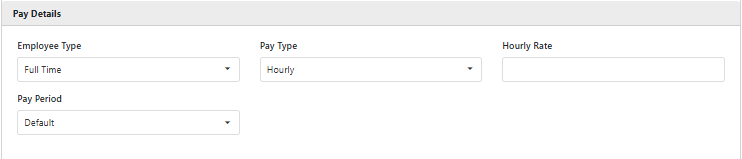
Pay Details
This section contains the details for the employee type (full-time, part-time, or casual), the pay period that they will be attached to, if they are getting paid at a salary or hourly rate, as well as $ value.
Tax
This section is for the employee's tax file number, as well as the tax category as advised by the employee.

Configuration
This section details the location in which costings will be assigned by default as well as the rule listing for how the employee will be paid.

- Department
Allows you to select the costing department to which the employee will be attached. - Category
Allows you to select a defined employee category to show on the employee's payslip. - Award
Contains a grouping of options to help with the maintaintence of rule sets, rate sets and allowance sets. - Rule Set
Allows you to link the payroll rules that relate to the employment such as whether the employee is paid at a salary, hourly rate, overtime and penalty conditions that may apply (using the timesheet processing method), leave accrual rates, as well as super payments.
Super Selection
This section allows you to set the superfund and member number that the employee is attached to.

The superfund will automatically select the default superfund specified earlier and will require a member number before you are able to proceed.
Once all relevant information has been added click the Save button to confirm the changes.
Please note that if you attempt to save the detail while it is incomplete notice will appear on the field to indicate that it is necessary. The employee's information will not save until all required fields are entered or selected

Inviting Employees to FLARE
As indicated in the Entering Employee Details (Onboarding Using FLARE) section, you have the option to send an invitation to the employee to allow them to enable benefits through the FLARE app.
For employees that were either set up previous to this feature or were elected to add manually to the system, you are still able to send them the Flare invitation through the Employee Details Screen, through the Menu dropdown.

Please note that for this feature to be available you will first need to have enabled your Flare benefits account, this can be done either by adding an employee and accepting the Flare conditions or through from the HR & Benefits screen.

From this screen, you have the option to select your preference if you would like the employees to receive an invitation to the Flare benefits app.

You can return to this screen at any time to enable or disable this for future employees as required.
Additional Employee Settings
Once this initial information has been saved, the system will take you to an extended detail section in which you are able to make further adjustments to their setup in the system by using the Options > Edit selection from the Employees screen

Key items for your consideration include;
- The Personal Tab:
Allows you to check and update if needed the employee's primary details. - The Dates Tab:
This contains the dates for the employee's commencement with the business as well as other items such as when they qualify for leave.
- The Groups Tab:
Used to change the employee's default location\department or add additional working areas that the employee is allowed to work within the business. Also included is the Employee Access option that allows you to select visibility options for the employee self-service portion of the system. - The Pay Tab:
You can specify items such as the employment type, hourly or salary pay rate, the linked payroll period, the ruleset (aka pay rules for payroll) that will apply to the employee, the Tax category the method of payment to the employee ie Cash, Cheque, or EFT, and superfund details.
You can also select to indicate an Allowance Set if you wish to be able to place custom payments against the employee - The Special Options Tab:
Allows for options such as the auto-creation of timesheets to be created if they are not already set for the day when the payroll is run. This feature bases its times on the Working Weeks tab. - The Leave Tab:
If you are bringing the employee over from another system they may already have a leave accrual in place, this tab allows you to enter against the employee, if this is your first time, use the Opening Balance columns. - The Working Weeks Tab
This details the average working week that the employee would be contracted to work.
Once you have looked through these options and are happy with them click the Save button to confirm them in the system.
You can find information on all of the options available on our Employee Options (Full Detail) article.Common Setups
Some common setups include
- Setting Up Casual Employees
- Configuring Working Holiday Makers
- Setting Up Directors And Closely Held (Related) Payees
- Setting up Contractors